
Meal Planner
Fill your week with recipes and foods, let the Genie propose a plan you still have to confirm, catch food before it expires, and hand the week off to your shopping list or your household.
Week view & meal filters
The default view is a 7-day grid, one column per day. Above it sits a row of pills — one per meal type — that show or hide that meal’s whole row across the week. Each pill fills with its meal’s colour when shown, and turns outline-only when hidden, so it’s obvious at a glance what you’re looking at.
Your filter choice is remembered — come back tomorrow and the same meals are still shown or hidden.
Day view
Switch to Day view (the toggle next to the week grid) and one day at a time fills the screen — every meal, stacked, with a day-to-day nav. Each planned recipe carries an honest have/needs line:
have all N · cook
Every ingredient is already in your kitchen — the line is itself a link straight to cooking it.needs N · on your list
Something’s missing — the line links to your shopping list to close the gap.
A fully-stocked dinner also gets a full-width “Cook now” button, so the shortest path from “planned” to “cooking” is one tap.
Tap to fill
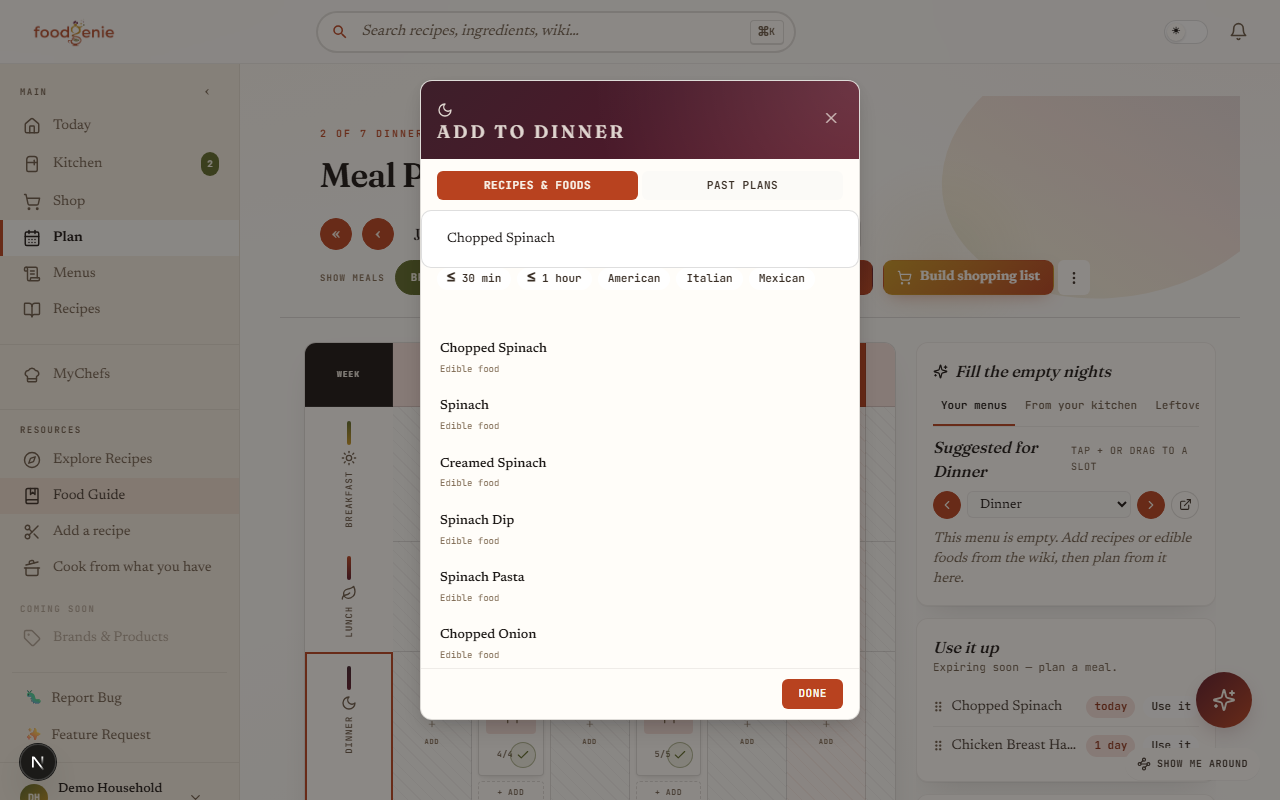
Every empty slot is a plain “+ Add” button. Tap one and a sheet opens — “Add to {meal}” — with a single search box that finds recipes and foods together, so a meal can hold a full recipe, a bare ingredient, or both. A separate Past plans tab lets you quickly re-add something you’ve cooked in a prior week. Anything already placed in that meal shows as a small chip at the top of the sheet, each with its own remove button, and a slot that already has something keeps its own “+ Add” for adding a second item alongside it.
Plan from your menus
The panel to the right of the week is titled Fill the empty nights, and it opens on Your menus. What you see there is not a list of menu names — it’s your actual menu, rendered in the design you chose for it, sitting live inside the planner. The ‘ ’ arrows page through your menus and the dropdown jumps straight to one.
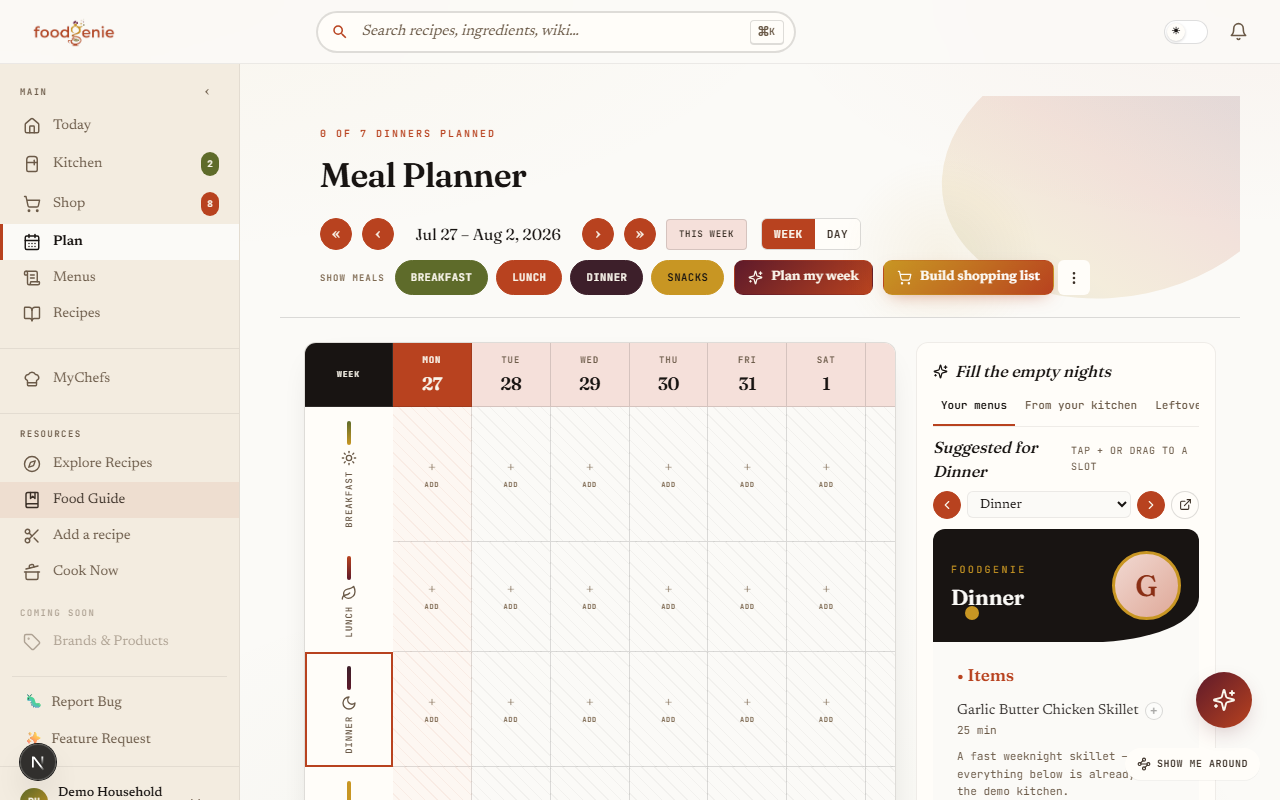
Every dish on that rendered menu is a real planning control. Two ways to use one:
Tap the + beside a dish
Drops it into the meal the panel is currently showing — the “Suggested for Dinner” heading tells you which one that is.Drag the dish onto a day
On a desktop pointer, pick a dish up off the menu and drop it on any day/meal cell in the grid. That’s the whole interaction — no sheet, no dialog.
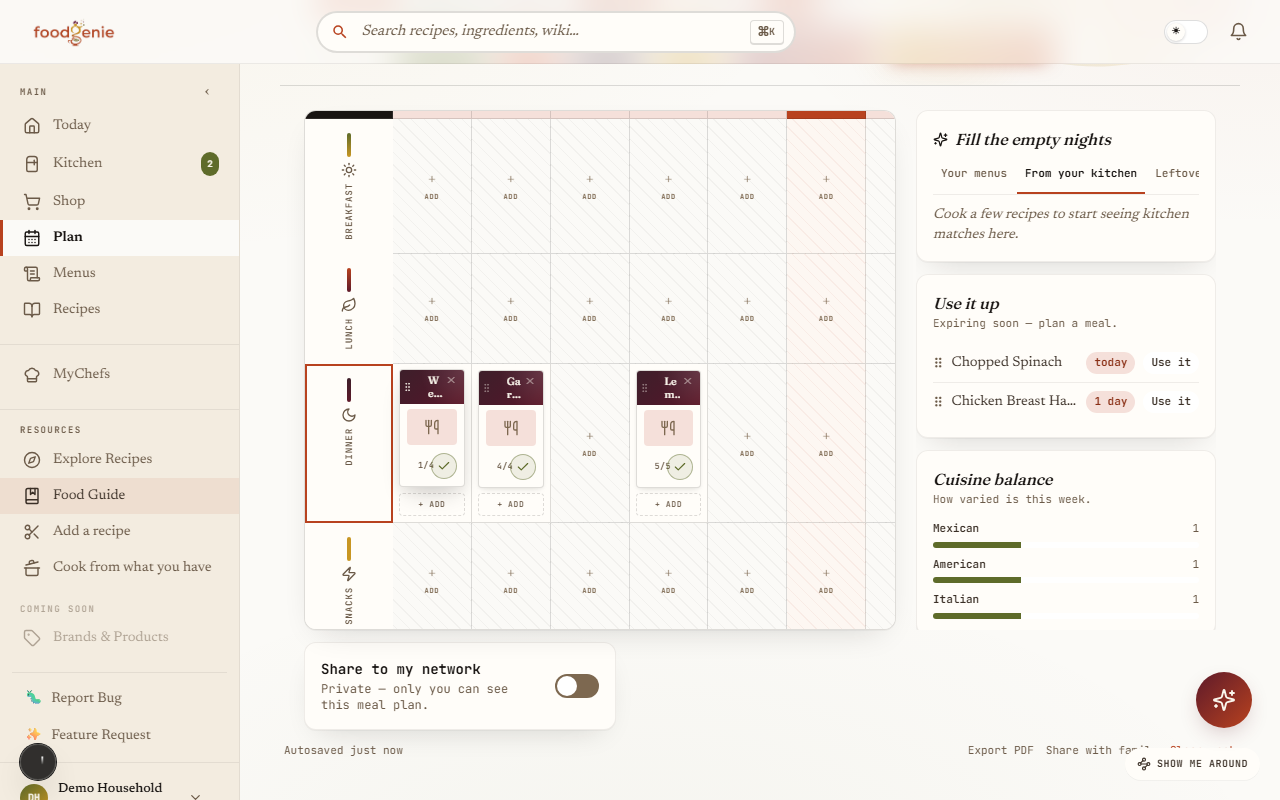
The clip above drags from the From your kitchen tab, but the motion is identical for a menu dish here or an edible food from Use It Up below — pick it up, drag it onto any day/meal cell, let go.
A menu can hold whole recipes and bare foods, and both plan the same way: a recipe lands as that night’s dish, a food lands as an item in that meal. The panel’s two other tabs cover the rest of the ways to fill a night — From your kitchen (ranked by what you already have) and Leftovers (see below).
Plan my week
Tap “Plan my week” (or ask the Genie to do the same thing in chat) and FoodGenie proposes a fill for the week’s empty slots — dinner by default, with chips to widen it to breakfast, lunch, or snacks. The proposal is kitchen-aware (it favors what you can already make), avoids repeating last week’s dishes and back-to-back cuisines where your recipe library allows it, and never assigns a dessert or breakfast dish to dinner.
Kitchen-aware
Recipes you can already make (or nearly can) are favored over ones that need a shopping trip.Checked against your household’s allergens
The proposal is screened against your dietary profile plus the allergens listed on every household member’s profile (member dislikes and taste preferences stay the requester’s own) — best-effort, so double-check ingredients yourself too, since a few allergens like sulfites or mustard have no detector.
Use it up
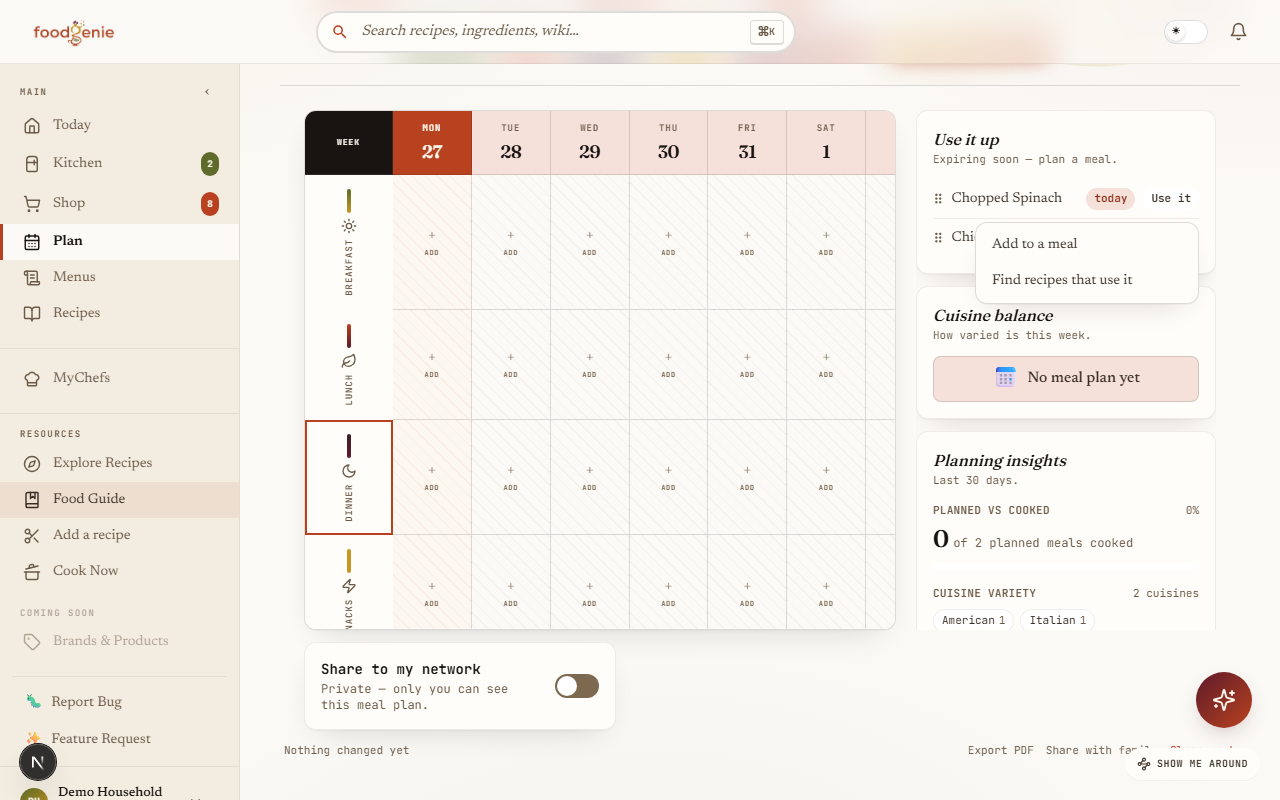
Food about to expire shows a “Use it” button in the sidebar. For anything edible on its own, tapping it opens a small chooser with two real actions:
Add to a meal
Drops it straight onto an open slot in your week, the same way the add sheet does.Find recipes that use it
Jumps to Explore, filtered to recipes built around that exact ingredient.
Leftovers
Saved leftovers get their own tab in the suggestions rail — the ones tied to a recipe that haven’t expired yet, soonest first. Re-serving one places that recipe back in a slot and marks the leftover eaten, all in one tap.
Was this page helpful?